Having a water emergency in your home is bad enough. But often one of the worst problems is that your important papers, pictures, personal photos, and books may have been damaged also.
Although we know better, we don't always remember to make copies of essential documents, and if we do remember, we rarely store them at a different location. Besides, essential documents are seldom the most precious documents we own. Most people value childhood photos and rare art books more than passports and insurance policies. When water damage affects documents, it is often a heartbreaking experience that leaves us feeling helpless and lost. And as we go about cleaning up after a flood, pipe break, or leak, we will sadly throw away soaked and soiled items, believing them to be beyond restoration.
But the truth is that if you take immediate action, it is possible to salvage most water damaged documents - including photographs, films, video recordings, and books. Documents can be restored by professionals, but only if prompt action is taken during the water clean-up. Wet books, documents, or photographs which cannot be air-dried within two days should be frozen to inhibit mold growth.
Here are some tips:
- Make a list of paper documents that have suffered water damage. Wrap them in wax paper, pack in plastic boxes, and freeze them. Freezing soaked papers will prevent further water damage until you decide what kind of restoration you need. If documents are covered with mud, it is best to rinse off debris before freezing.
- Film documents should be sealed to prevent drying and blocking. Inventory, box, and seal. If possible, refrigerate at 35°F.
- To prepare leather and vellum bound documents for future water damage restoration, try to separate the paper from the binding before freezing.
- Video and sound recordings, CD's, audio, and videotapes should be air-dried within 48 hours of water damage. Pack them vertically in cardboard or plastic boxes. Water damage restoration of tapes is best done professionally.
- To a certain degree, water damage restoration of photographs can be done at home. Alternatively, stick the photos into a ziplock bag and place it in the freezer until after you have finished the cleanup.
mmediate action ensures that documents will not suffer further water damage - including the risk of mold growth. Frozen documents can be stored indefinitely until you decide how you would like to handle the restoration process. Since frozen documents turn into blocks of ice, it is important to categorize and inventory them before freezing so you know what is where. Remember, by taking immediate action you can stop further water damage and mold growth.
There are some actions you can take at home to save photos and books. Here are a few ideas: 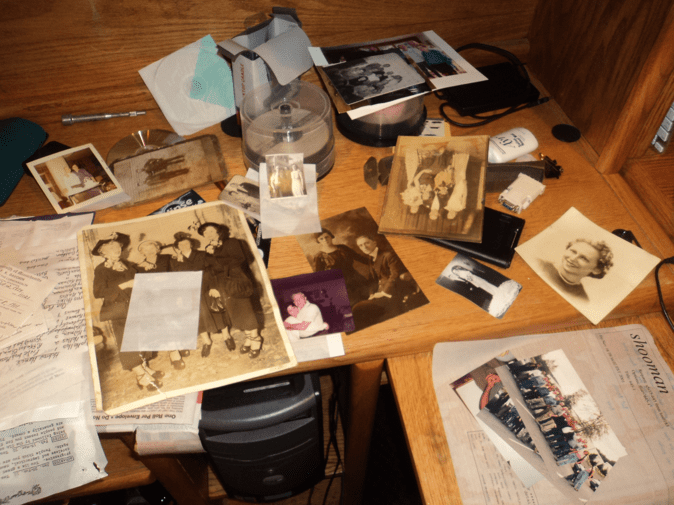
You can try to restore water-damaged photographs yourself. Repair colored photos before black and white ones. Work in a cool, dry room, away from direct sunlight. Without touching the surface, swirl photos around in clear cold water to remove any dirt. Most prints, negatives, and slides may successfully be air-dried face up. Lay the clean wet photos face up on blotter paper, placing small weights on the corners to prevent edges from curling. Change blotting material as it becomes soaked. Or hang the pictures carefully from a clothesline to dry. Photos that are stuck together should be soaked in warm water for about one hour.
For framed items, remove the backing material from the frame. If the item is not stuck to the glass, carefully remove it from the frame and air dry. If the object appears to be stuck, do not attempt to remove it from the frame. Dry intact with the glass side down.
If your books have been affected, don't despair. There is an inexpensive way to restore wet books, although they won't be as perfect as they were before. Ideally, wet books - especially sopping wet ones - should be brought to a preservation expert for restoration and repair, but if you don't have access to one or find the service too expensive, here's a way for you to do book drying yourself.
Air drying is the cheapest method of bringing wet books back to their dry state and does not require specialized equipment. This process takes a fair amount of time and is labor-intensive, but if the book is a favorite, then the time is well worth it. Air drying works best for books that are damp and only mildly wet. If your book was soaked, expect the drying time to take much longer. One other thing to remember is that this process works best for books that are made of plain paper, not coated ones.
Prepare your drying environment and equipment
To help in the drying process, you will need the following equipment:
- A book press - or if you don't have one you can use heavy objects such as bricks or a telephone directory
- Press boards - hard paper boards in between which you will sandwich the book to reshape it
- One or more fans
- Paper towels and blotter paper
- Wax paper or freezer paper
- Disposable gloves
Use a place that is clean, dry, and where the temperature and humidity are low. Make sure the temperature is below 70° and the humidity is below 50%. Position your fans so that they are facing upwards and not directly towards the book to be dried.
Prepare the books/sheets to be dried
If you are drying an entire book, place unprinted paper towels, blotter paper, or blank newsprint in between the pages of the book. Wet paper is very fragile so do this carefully. For better drying results and to minimize tearing the book's leaves, wear gloves when handling the book. Lay the book flat to place the interleaves. If the book is very wet, you may have to do this in stages, because adding too many interleaves at a time may damage the book's binding.
If the book is made of coated paper, use wax paper as interleaving sheets. Coated paper, like that found in coffee table books, is different from that of regular books. When books of coated paper become wet, once dry the pages tend to stick together. Wax paper will help to minimize the adhesion. The process of using wax paper will take longer than with regular paper because moisture will have to be allowed to evaporate naturally.
If the book is saturated with water, don't try to forcibly separate the sheets. Place absorbent paper only on the sheets that separate easily. When the book is partially dry and the stuck sheets have separated, you can then place additional interleaving sheets in between the pages. Don't forget to place the paper in between the covers too. After you're done interleaving all the pages, position the book so that it is standing up, with the pages fanned slightly open. Place extra paper towels or newsprint below it to absorb the moisture.
Dry the books with a fan
Now that the books are interleaved and standing on absorbent paper, you can turn the fan on. Remember, always position the fan upwards and away from the books that you are drying. You don't want the pages to come off. Never use an oven or hairdryer for book drying - this will result in your book's pages becoming crispy and crumbly.
Drying with a fan will take several hours at the very least and can last for days. It is a slow process but necessary to make sure the book is fully dry and to prevent mold growth and page warping.
Check on the drying
Check the books regularly and replace the blotting paper with fresh dry ones. Inspect the books for mold growth which usually will happen within 24 to 48 hours. If you find mold growth on the pages of a book, you can gently brush it off with some alcohol on a cotton swab.
Replace interleaving sheets often
This process can be lengthy and labor-intensive, but replacing the blotting paper often will allow the moisture to be absorbed faster. Each time you replace the interleaving sheets, stand the book on its other side so that the drying process will be distributed evenly. If you don't then one part of the book will dry faster and the pages may warp.
Press the book
Once the book is dry, place it on a flat surface. Gently form it back into its normal shape. Then, place a weight on top of the book. Leave the book pressed under the weight for several days. Do not stack books that you are drying on top of each other. Also, do not place the books back on your shelves until they are thoroughly dry.
We hope you find these tips helpful tips to save important documents and photos from water damage. If you experience water damage and require restoration assistance, call ServiceMaster Dynamic Cleaning. Our technicians are on call 24 hours a day, 7 days a week to provide fast, efficient water mitigation services. Call (800) 865-5157 or contact us now.